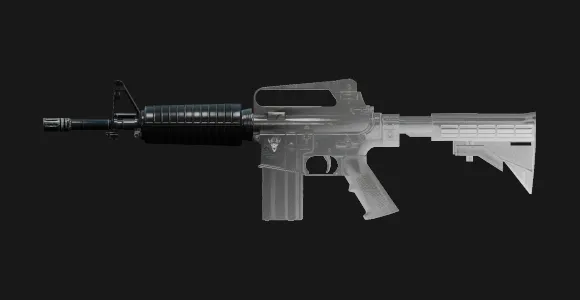
This is a port of OVERKILLs icon creator found in the game files.
It can be used to make icons for weapons, masks, melee weapons, throwables, characters, outfits and gloves.
You can open the tool by going to Options > Inventory Icon Creator. There you can preview basically every item, from weapons to outfits, vanilla and Add-On.
Clicking on "Export" will switch you to windowed mode before generating 2 images in the export folder inside the mod's directory:
*item_id*_dif and *item_id*_dph.
the _dif image is the actual screenshot of your item while the _dph is basically a mask to remove the background from the icon.
Note: When exporting as .tga, the _dif image's alpha channel needs manual fixing before the image is usable. Below is a guide for that. Exporting as .png will not require any fixing and can be used right away.
You can use the two images together to make high quality renders, edit the result to create inventory icons using the methods below, or just use the _dph image for an outline picture.
Fixing the _dif texture's alpha channel + Removing Background using the _dph texture:
Spoiler!
(We're only explaining this for GIMP, however the process should be the similar in Photoshop or other image editors.)
- Import your
_difimage into gimp by dragging and dropping it in.

- In the "Layers" list, right-click on your
_diflayer and click on "Add Layer Mask...".

- Select
Transfer Layer's alpha channeland click "Add".

You can now color the mask white to make the whole image visible, or continue with the steps below to remove the background using the _dph texture.
- Import your
_dphimage by dragging and dropping it into the layer list.


- Select the
_dphlayer you just imported and pressCTRL + C. Then select the mask of the_diflayer you created earler and pressCTRL + V.


- Right-Click on the Floating Selection that just appeared and click on "Anchor Layer". Then hide the
_dphlayer by clicking on the little eye-icon in the layer list, or delete it entirely as you won't need it anymore.

GIMP template project files:
Spoiler!
In this Google Drive folder, we provide template project files for GIMP, so all you have to do is drop-in your exported images from the ingame tool and with as little work as possible have your finished icon ready to go.
Just import your _dif and _dph images into the corresponding "INPUT" layer group.
Stylized Icon
This will make your image look like the default vanilla inventory icons.

Outline Icon
Outline Icons are used by the VR version of the game. You only need the exported _dph image for this.

FBI Files & Wpn Skin
This will only remove the background from your image, good for FBI files style icons or custom weapon skins.

Editing the Image without the GIMP template:
Spoiler!
If you don't want to use the provided GIMP template, here are some steps that can be used as a guideline:
- Import your 2 images
- Fix the
_dif's alpha channel - Apply the
_dphimage as a mask to the_dif - Apply the following to the
_dif:- Saturation 0%
- Color Invert
- Brightness -100
- Contrast +75
- Color to Alpha: Black (#000000)
(Brightness and Contrast can be adjusted as needed, these are just some examples that gave us good results when testing.)
Disclaimers:
- We do not know the exact settings and steps OVERKILL uses to create their icons, this is simply a description on how to get a similar effect to the vanilla icons. There is no one-fits-all solution for every item so feel free to tweak and adjust the values how you see fit and works best for your icon.
- Because of the way the perspective needed for the icons was created, they sometimes have weird visual glitches on them, this can be mitigated somewhat by moving the item around, but there is no complete fix for it and some of OVERKILLs own renders contain these errors too.

