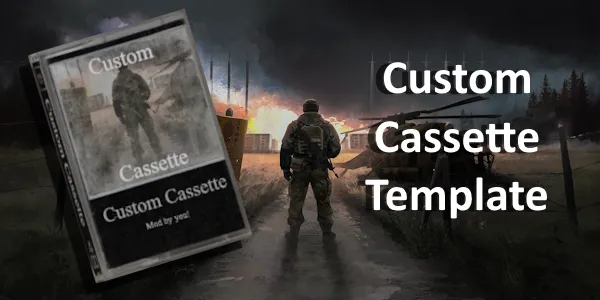
Overview
The following is a template and tutorial for creating your own custom cassette tape for Road to Vostok.
This tutorial is split into 2 portions, one for adding the music (required), and the other for changing textures and names (optional).
You are only required to complete steps 1,2 and 3
This may look very daunting, but I guarantee you can complete a cassette in about 10 minutes.
If you have any questions, problems, bugs, etc. please don't be afraid to ask in the comment section. I will be working to streamline this process in the future.
To use your cassette you must install the Cassette Framework mod.
You may need to launch the game twice after installing your cassette so the proper files can be generated
Tutorial: How to create your own cassette!
You can begin by downloading the CassetteTemplate.zip file.
Please extract it into a folder of the same name (i.e. CassetteTemplate).
Step 1: Downloading your music! (Required)
Download the song you want as an .ogg file.
.ogg is a common audio file format, and you should be able to find converters online if you have a different format.
The hard part is ensuring that your file uses the correct codec*. The codec you're looking for is Vorbis.
If it is not, or you are unsure, please see the section below.
If you're downloading from Youtube, you can use this website to ensure it's a Vorbis .ogg file.
*This is because Godot (the engine the game is made with) only supports Vorbis audio files.
Converting .ogg files (Conditional):
If you're .ogg file is not using Vorbis, you need to convert it. You can do so by doing the following:
- Install FFmpeg
- In Powershell, run the following code and change
inputandoutputas needed:
ffmpeg -y -i "input.ogg" -c:a libvorbis -q:a 4 -ar 44100 -ac 2 "fixed_output.ogg"
I do apologize as this can seem complicated.
Step 2: Adding your songs (Required)
Add your .ogg files to the mods/CassetteTemplate/ folder and you're done!
The name of the .ogg file determine the name of the song used in-game. Any _ or - in the name will be converted into a space.
Step 3: Save your mod as a .vmz file
If you want to change the textures and names in-game, complete the optional steps (4 & 5) below BEFORE completing this step.
If you would like to save space, you may move or delete the following template files:
Cassette_Render.blend
Cassette_Render.blend1
Template TX_Casette_Template_AL.pdn
Template_Icon_Casette_Preview.pdn
Ensure that the following files are in mods/CassetteTemplate
Icon_Casette_Template.png
Icon_Casette_Template_Preview.png
Main.gd
MS_Casette.obj
TX_Casette_Template_AL.png
+ .ogg files added
Select mods and mods.txt. Right-click and use either 7-zip or Send To to convert it into a .zip file.

Name it whatever you would like, but edit the .zip into .vmz. You will receive a warning, but ignore it and click Yes

.vmz is just a renamed .zip, it's the community convention for Vostok mods.
And CONGRATS! You have officially made your own cassette with your own music! Have fun and enjoy!
Step 4: Changing in-game names (Optional):
In the mods/CassetteTemplate/ folder, open the file named Main.gd. You can use any text editor, such as Notepad, however VS Code is recommened.
It is NOT required to change Template anywhere in the files or folder names.
When changing names, you MUST ensure these three are the same.
| Match | Location |
|---|---|
| const MOD_FOLDER: String = "CassetteName" | Found in Main.gd |
| CassetteNamePack="res://mods/CassetteName/Main.gd" | Found in mod.txt |
| mods/CassetteName | The folder name |
Ensure that const ITEM_FILE_ID: String = "Cassette_Template" is unique, that is if there are other cassette mods, ensure that Cassette_Template is different to all other ITEM_FILE_ID's
Anything else isn't necessary to be consistent.
Step 5: Changing the in-game textures using templates (Optional)
Included in the .zip are 3 .png files and 3 .pdn files.
The .png files are the raw textures used in-game. You can edit these directly, but it is recommended to use the .pdn template.
The .pdn files are template files to make the process easier. .pdn files are for a program called Paint.NET found here. It is a simple image editing software.
I will go through how to setup each file individually.
TX_Casette_Template_AL
This is the texture the 3D cassette model uses in-game.
After opening TX_Casette_Template_AL.pdn you'll notice 5 layers. The only ones we'll be touching are Cover and Text.

Cover is quite simple, just place whatever cover you want over the current one. The template will automatically ensure you stay within the borders, so don't worry about getting it just right!
For Text, just place whatever text you like on the layer. The settings I use are the following:
| Setting | |
|---|---|
| Font | Times New Roman |
| Size | 20pt |
| Color (Hex) | A5A5A5 |
Then just Save As your new texture as a .png and save it as TX_Casette_Template_AL.png or whatever you have in your Main.gd file. Make sure it is in mods/CassetteTemplate/.
Paint.NET will prompt you to "Flatten" the image. Select yes by clicking "Flatten"


Icon_Casette_Template
This is the icon for the item when in your inventory in-game.
This one is a bit of a doozy, but can be done easily if you just follow carefully. This one requires Blender.
After creating your TX_Casette_Template_AL.png file, you can use it in the included Cassette_Render.blend file. If you kept the name as TX_Casette_Template_AL.png (recommended) then it should path to the texture automatically.
Opening Cassette_Render.blend may seem overwhelming, especially if you've never used Blender before, but the file is setup such that you shouldn't need to do anything but render.

Just press F12 and you should see a little 128x128 render.
Just click Image then Save As and save it as Icon_Casette_Template.png or whatever you have in your Main.gd file.

Icon_Casette_Template_Preview
This is the 2D texture used in the Cassette Player menu.
Thankfully, this last one is very simple and easy.
Open Template_Icon_Casette_Preview.pdn and select the Text Layer.
I use the following settings:
| Setting | |
|---|---|
| Font | Times New Roman |
| Size | 20pt |
| Color (Hex) | 424242 |

Then follow the same steps you did for TX_Casette_Template_AL.
Save As your new texture as a .png and save it as Template_Icon_Casette_Preview.png or whatever you have in your Main.gd file. Make sure it is in mods/CassetteTemplate/