𝗩𝗶𝗱𝗲𝗼 𝗿𝗲𝗽𝗹𝗮𝗰𝗶𝗻𝗴 𝗮 𝘀𝗸𝗲𝗹𝗲𝘁𝗮𝗹 𝗺𝗲𝘀𝗵:
https://www.youtube.com/watch?v=cy5UBp4rIlk
If you did not change any settings when importing the PD3 asset into blender
check Images for the standard export settings when exporting most if not all finished models
Always use the game's existing skeleton instead of paking the one that your object generated to avoid breaking animations unless you absolutely need to
Make Sure you recreated the exact file path and name of the object you are replacing and its other files!!
𝗧𝗼𝗼𝗹𝘀:
𝗕𝗹𝗲𝗻𝗱𝗲𝗿
or download through steam
(Main tool used to alter 3D objects)
𝗕𝗹𝗲𝗻𝗱𝗲𝗿 𝗣𝗦𝗞 𝗜𝗺𝗽𝗼𝗿𝘁𝗲𝗿 𝗮𝗱𝗱𝗼𝗻
(Allows you to Import extracted unreal engine models into blender)
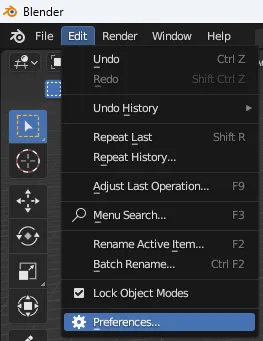
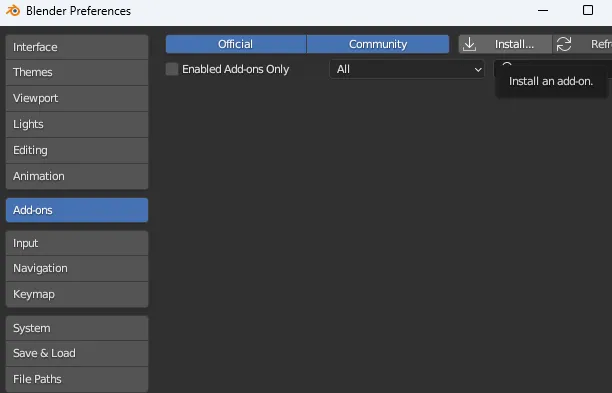
install by opening blender, going to the edit tab, addons, install and select the downloaded file
𝗙𝗠𝗼𝗱𝗲𝗹
(Allows you to view and extract Unreal engine assets)
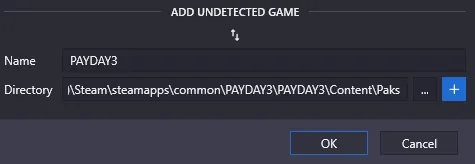
Open the Directory tab and choose selector option, name it whatever and insert the file directory of your Payday3's .pak folder
𝗙𝗠𝗼𝗱𝗲𝗹 𝗣𝗮𝘆𝗱𝗮𝘆𝟯 𝗔𝗘𝗦 𝗸𝗲𝘆:
0x27DFBADBB537388ACDE27A7C5F3EBC3721AF0AE0A7602D2D7F8A16548F37D394
(Allows you to view Payday3's .pak files)
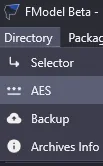
Insert into AES option in Directory tab
𝗨𝗻𝗿𝗲𝗮𝗹 𝗘𝗻𝗴𝗶𝗻𝗲
Make sure to select and download version 4.27.2 as that is the current engine version Payday3 is using

𝗨𝗻𝗿𝗲𝗮𝗹𝗣𝗮𝗸
(Tool used to compress the cooked assets for unreal engine)
(Adding z_ and _P to the start and end of your mod name supposedly helps with loading but am unsure)
(adding pakchunk-00_Mods- determines what priority it has, the higher number always loads first, useful when you have mods that replace the same thing)
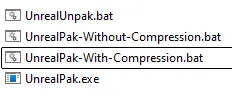
Drag and drop your folder containing all your custom assets onto the 'UnrealPak-With-Compression.bat' and drop the .pak file into your ~mods folder
Would recommend using either 𝗚𝗶𝗺𝗽, 𝗣𝗮𝗶𝗻𝘁.𝗡𝗘𝗧 or 𝗣𝗵𝗼𝘁𝗼𝘀𝗵𝗼𝗽 for editing textures
though the main tool I would recommend is Gimp
𝗠𝗮𝘁𝗲𝗿𝗶𝗮𝗹 𝗜𝗻𝘀𝘁𝗿𝘂𝗰𝘁𝗶𝗼𝗻𝘀:
After creating an unreal project named PAYDAY3,
create folders: MasterMaterial > Vehicles > Helicopter, right click and create Material, Rename to: MM_HelicopterInterior
Open the material and do the following:
- create texturesampleparam2d, Rename: Albedo(RGB)Labels(A), drag RGB into BaseColor
- create vectorparameter, Rename to: EmissiveColor(Mult_CPD)
- create multiply, drag Albedo A into multiply A, Emissive RGB into multiply B and multiply's output into Emissive color
- create another texturesampleparam2d, Rename to: BaseNormal(RG)Roughness(B)Metallic(A), A into Metallic, B into Roughness
- create append, BaseNormal R into A, G into B,
- create constant and change value to 1
- create another append, apply constant output to its B, apply the other appends output to this ones A
- create normalize and apply append output to it, apply normalize output to Normal
- save and exit out of the material editor tab, create a material instance and name it whatever you want.
(You can then copy paste the material Instance to the folder with all your custom assets)
(Moolah modding site has a tutorial on how to do this if you have any issues with these instructions)
Texture Channel Simplifications for HelicopterInterior Material:
𝗡𝗼𝗿𝗺𝗮𝗹 𝗺𝗮𝗽 𝗰𝗵𝗮𝗻𝗻𝗲𝗹𝘀:
Red > Normal y axis
Green > Normal x axis
Blue > Roughness
Alpha > Metallic
(Make sure Unreal uses Default or BC7 compression settings and Not NormalMap!)
(Make sure sRGB setting is false on normal map textures imported into Unreal)
(Unreal Engine uses DirectX normal maps so make sure everything is curving inwards)
𝗕𝗮𝘀𝗲𝗖𝗼𝗹𝗼𝗿 𝗰𝗵𝗮𝗻𝗻𝗲𝗹𝘀:
Red > BaseColor
Green > BaseColor
Blue > BaseColor
Alpha > Emissive Strength
(Alpha channel should be nothing or almost nothing to avoid lighting issues)
(Make sure sRGB is turned off)
𝗖𝘂𝘀𝘁𝗼𝗺 𝗖𝗼𝗹𝗼𝘂𝗿𝘀:
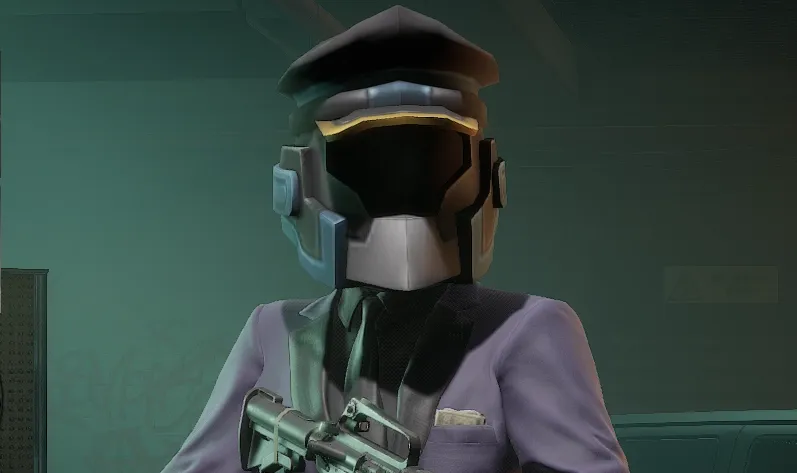
Planned to include how custom colours work on weapons and outfits in Payday 3 but for now it only shows the basics of replacing models
𝗠𝗶𝘀𝗰 𝗟𝗶𝗻𝗸𝘀:
Modworkshop Discord server
(if you need help with stuff we can better help you here)